How To Bring 70's Inspiration To Your Spring Style

Leave a Comment
It's no secret that I dig the 70's. Sure, some of the fashion trends are questionable in this day and age but so sue me I love a good floral and a flare here and there... or everywhere. So if you fancy yourself a little 70's boho babe, here's a few outfits to get your creative juices flowing 
1. Florals? For Spring? Ground breaking. BUT LOOK AT MY BOOTS. I think Miranda would forgive me for my predictable Spring print since it's paired with these Gary Glitter boots, so 70's and so wearable. LUSH
(SHOP: DRESS- DEBENHAMS     BOOTS- DEBENHAMS    BAG- TOPSHOP    BELT- ELLIOT RHODE)
2. There's more denim here than Britney and Justin C. early 2000's, but if you're gonna whip out the flares you might as well commit. Pair these with heeled ankle boots and a boho top and you're groovy baby
(SHOP: JEANS- MISS SELFRIDGE   BOOTS- DEBENHAMS   CROP TOP- MISS SELFRIDGE     WHITE TOP- HOLLISTER      NECKLACE- H&M)
3. This dress just screams WOODSTOCK, and yes I know that was in 1969, but I mean c'mon, the 70's vibes were still strong. Anything flowy and long is perfect for this trend and it's the sort of thing you could get away with in a city environment too, well I mean you might get a few stares in Sainsbury's picking up your guacamole but SORRY SUSAN IT'S CALLED FASHION, LOOK IT UP!
(SHOP: DRESS- TOPSHOP     BOOTS- DEBENHAMS)


SHARE:
0 comments

How To Get Perfectly Plumped Puckers (Without The Needles)

Leave a Comment
We are currently living in the era of many things, Brexit, Trump and of course, Kylie Jenner. When you think of this Queen of Instagram everyone thinks of those lips. Now I dunno about you but I'd rather spend my money on the Friday night sesh or new shoes than lip injections (plus needles and me are not buddies... I shouted, quite unexpectedly at a Doctor once) So if you still fancy plumping up your pluckers a little without the cost or pain of surgery then here's a little tutorial to get you on your way!
1. Grab yourself a lip mask ( I know, most extra thing in life) Leave on for around 15 minutes depending on the brand, they give you nourishment and often an extra little plump, making them the perfect tool to use before applying a heap of lippy
 2. Lip contouring is something I've seen floating around Instagram, it's supposed to give your lips more volume and a fuller appearance. Use a brownish lip liner and colour in the corners, line the edges and draw a deep line down the middle. You look like the ugly step sister in Shrek to begin with but just trust me here
SHOP: MAC WHIRL LIP LINER  
3. Now pull out your favourite lippy and fill in the rest of your smackers, ensuring it's thick enough to cover the contour but not too heavy that it looks cracked. Then take your liner and blend the two together over the edges 
SHOP: MAC BRAVE LIPSTICK
 4. Now glowse those bad bois hunny. Make sure you use a plumping lip gloss coz... I mean duh
SHOP: SOAP AND GLORY LIPGLOSS
 5. Finally highlight your cupids bow to really define it and then shade a tiny amount of bronzer under your bottom lip to give the look of a shadow. There you have it! Plumped and lavely with no blood, sweat and tears and enough money left to get those Topshop jeans you've had your eyes on
SHOP: MARYLOUMANIZER THE BALM HIGHLIGHTER

SHARE:
0 comments

How To Make Scones Like A Laaaaddyy

Leave a Comment
A Laaaaddyy (pronounced leighhh-dee) isn't like an ordinary Lady. A Laaaaddyy believes one's best accessory is Pearls and Champagne. She spends her mornings in Harvey Nicks and her afternoons hosting luncheons with her similar Laaaaddyy pals. If you ever find yourself in one of these mystical meetings, you'll find magical items such as finger sandwiches, bubbles and of course, scones. So if you fancy yourself as a little Laaaaddyy here's the recipe to get you started! 
1. Preheat the oven to 200oC and sift 250g of self raising flour, add 50g of golden caster sugar and 1/2 teaspoon of baking powder
2. Rub 100g of butter in with the dry ingredients until it makes fine breadcrumbs
3. Beat one egg and add this, dried fruit (depends on how much you prefer) and 70ml of milk to the breadcrumbs. Combine until you form a ball of dough 

4. Flour a surface and roll the dough out to around 3cm, use a round cutter and put each scone onto a baking tray, brush some milk onto the tops to create a glaze, place into the oven and cook for 10-12 minutes.


5. Grab some jam and cream, champagne and your laaaaddyy friends and enjoy!

SHARE:
0 comments

How To Get 'Woke Up Like This' Curls

Leave a Comment
We've all seen those annoying films or T.V shows where the girl wakes up from a good nights sleep with perfect hair, and I bet you've all sat there, clutching a bowl of Ben and Jerry's wearing old p.j's yelling internally -  "FRAUD!!" Well, no more must we watch these moments filled with jealously and rage because this quick and easy tutorial gives you all the ways you need to create the perfect 'woke up like this' curls, hope you enjoy!
1. Run some Smooth Serum through wet hair to ensure you get rid of frizz, my favourite is Umberto Giannini. Most days I'll use it, totally ignore my hair and focus on more important things like custard and Pinterest and then end up with fab beachy waves, no heat (or effort) needed. HOWEVER for something a little more 'groomed' might be worth putting the custard down (maybe that's just me) and following the next few steps!
 2. Blow dry your hair, try doing this as smoothly as possible, so you won't need to straighten it before the curlers come out
 3. Once hair is dry, or at least damp, it's often worth using some Mousse to ensure that the curls we create hold for a couple of days (especially if you intend on sleeping on them)
 4. Separate hair into 3 layers (you might get away with 2 depending on length and thickness) then wrap a strand round the curling iron ensuring that you hold in a vertical angle for around 10 seconds (again if you've got thinner hair don't ignore the smoke and flames by counting to ten!) Once released spray each section with hairspray
 5. Ok, I'm fully aware that at this point, we look ridiculous, like a weird Medusa vibe, but just stick with it. Drown this monstrosity with hairspray and DON'T TOUCH the curls until they've completely cooled, normally safe to leave it around 5 minutes. Then once it's safe, brush out the curls and give one final spritz with hairspray and BOOM left with soft, loose bouncy curls, which will last through a nights sleep (I'm the biggest fidget and they still hold so they're strong!) Now you can wake up like a Disney Princess and let the small woodland creatures get you ready for the day.


SHARE:
0 comments

Your Must See Guide To Los Angeles

Leave a Comment
There's nowhere quite like California- especially if you're from London, the level of customer service and sunshine and great teeth just whack you in the face, WHAT IS ALL THIS?! Sort of like stepping off a 10 hour flight into heaven. 3 years ago I was lucky enough to go the home of the stars with 3 of my best friends and it was magical. Although we were only there for 5 days we made the most of each one and squeezed in ALOT of stuff. So if you're heading to the L.A any time soon here's my hit list of the places you must see. (P.S unfortunately the trip took place before I had any sort of Blog or Instagram account so there's a few less worthy pics than normal!)
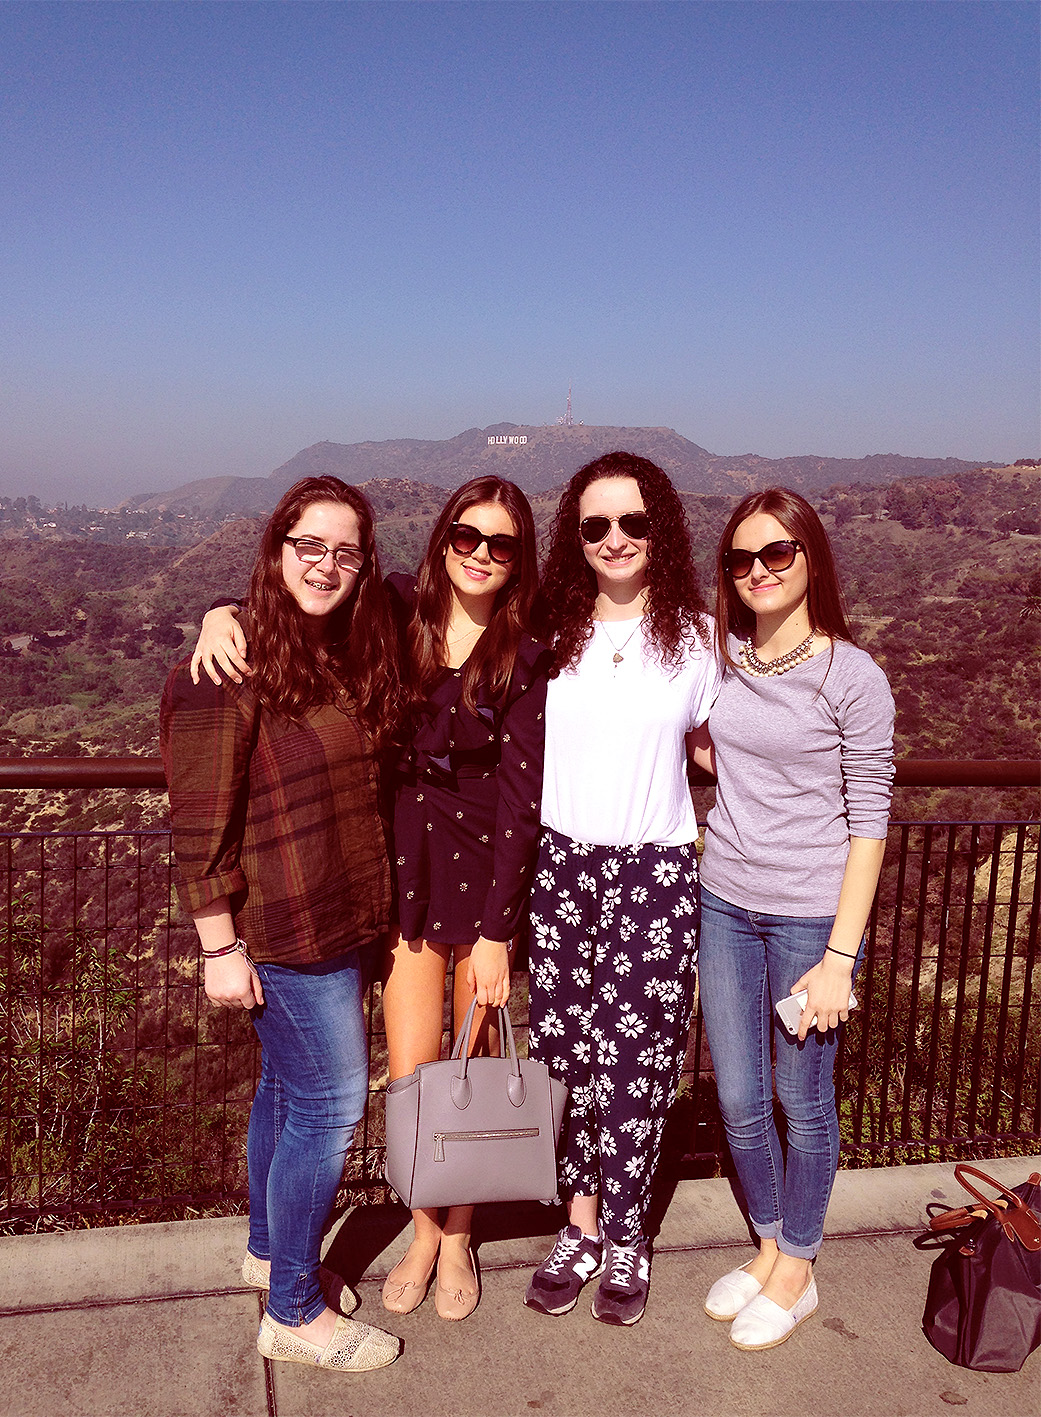
HOLLYWOOD SIGN
I promise you in real life the sign seems a hell of a lot closer, once we looked back at the pics we were like 'IS THAT IT?!' However it really does take your breath away, poor Alex had the pleasure of sitting next to me on the coach for the journey there. "I SEE IT OMG OMG IT'S REAL LOOOOOOOK!!!" Big tip, take sunglasses, it's so, so bright up there and poor Lucy Lu did not get the memo, subsequently she has her eyes shut in every photo.
(Precious memories Queen!)
DISNEYLAND
Of course I was completely buzzing to go to Disneyland, even if I was sulking about NOT being a Disney princess for a little while (1st photo: exhibit A). If you think Californians are over the top peppy, go to Disney, good Lord the happiness was pouring out of them, we could feel our sarcastic British skins peeling away by the second. Such a magical place and 100% a must if you're in town.
SANTA MONICA
We headed to Santa Monica beach after a solid shopping sesh  (try saying that in a hurry) just in time to watch the best sunset I've ever seen. I honestly could not imagine a more heartfelt moment in my life than watching the waves while carrying an obscene amount of bags filled with pure designer bargains and happiness, eat your heart out Julia Roberts. Was absolutely dying for a shop assistant to turn me away just so I could go back later with all my bags and tell them BIG MISTAKE, BIG, HUGE!...Unfortunately as I kept forgetting EVERYONE in L.A is friendly. Anyway if you're looking for the prefect end to a day, Santa Monica is the place to be and Bubba Gump Shrimp is definitely where you should be eating.
WALK OF FAME 
Another real Julia Roberts moment was walking along Hollywood boulevard (one of the less glam moments granted) But being able to see the Hollywood stars and the Chinese theatre was completely surreal, just casually holding hands with Marilyn Monroe here. We went in February, a week before the Oscars so we were able to see the REAL red carpet being set up, of course I dropped to the floor, leant under the barriers and just stroked it... like a psycho... worth it.  
 UNIVERSAL WORLD
Universal world was filled with dramas, including bags being stolen... and found again! However it was probably the most fun we had the whole trip. The rides are great and you absolutely have to go on the movie tour, being able to see film sets was the coolest thing (unless you're Alex, whose terrified of sharks and was swept into the JAWS set, rather unfortunate!) 

WARNER BROTHERS STUDIOS
Finally before heading to the airport we had time to visit the Warner Brother Studios, which included CENTRAL PERK... THE CENTRAL PERK. Since everyone in the world likes F.R.I.E.N.D.S it's definitely a place you need to see and it's filled with plenty of other movie sets and props, photo opps at every corner!

SHARE:
0 comments
Next PostNewer Posts Previous PostOlder Posts Home
BLOG TEMPLATE CREATED BY pipdig