How To Get Bouncy Waves Without Curlers

Leave a Comment
I'm very lazy when it comes to my beauty routine, I'll admit that openly. So if there's a hack which means your hair is magically becoming beautiful while you sit and watch the Madeline Mccan doc (hands free for snacks) then I'm here for it. Watch and learn my fellow lazy lasses.
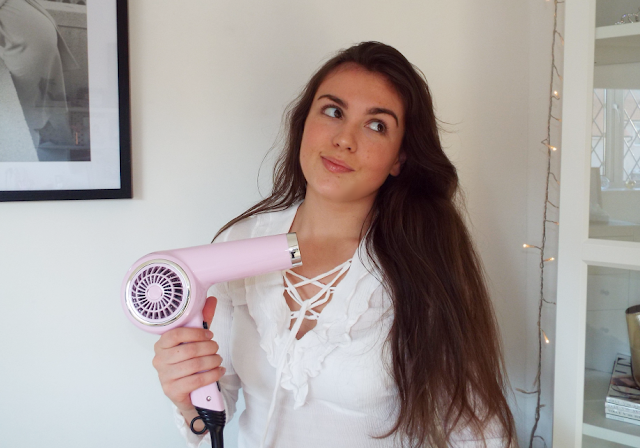
 1. Add serum to wet hair, along with heat protector spray then blow dry. How cute is my beauty school drop out hair dryer btw?

 2. Once dry add some mousse, we want our hair just stiff enough that it will hold styling but doesn't feel crunchy- not the one.
 3. Split hair into 2 sections and create 2 little space buns, ensuring that you twirl the hair into twists before you create the buns themselves, then lock that shizz in and spray with hairspray, PLENTY OF IT. Allow to chill like that for a good few hours, take a nap, you've earnt it. Then voila, looking like you actually spent time and effort mucking about with curling wands and burning your hands, I won't tell if you don't.


SHARE:
0 comments

How To Get Woodstock Glam

Leave a Comment
I'm not gonna play the whole 'I was born in the wrong decade' card because I'm currently writing this on a MAC listening to music on earphones and awaiting Dominos, all impossible acts during the 60's/70's. However I am obsessed with this time in history, the music, the icons and the fashion. So if you're like me and would die to go back in time to see Woodstock,  this look might just be for you.
STEP ONE: Mix and illuminator and liquid bronzer for a base- Hippies had a perfect California glow let's not forget

 STEP TWO: Apply blue glitter, white eyeliner to water line and mascara to eyes. GROOOOOOVY
 STEP THREE: Add your powders, bronzer, highlighter and blush, keeping in theme with the dewy, glowy vibe
Then ensure you plait your hair how you like, grab some boho accessories and you're on your way!

SHARE:
0 comments

How To Do Your Make-up Like An Abercrombie Model

Leave a Comment
Abercrombie models are not human beings- they're aliens sent from California, who have perfect bodies and perfect faces and casually stroll up to us while we're trying to shop asking 'how you doing?' So if you feel like pretending for the day that you're one of these magical robots then here's a makeup routine to get you started !

STEP ONE: Get your eyes bronzed and glowy, stick to subtle layers and nude shades, Abercrombie models obviously just wake up with glittery eyelids, but us mere mortals have to pretend. Don't forget some low-key brows and mascara too!
STEP TWO: Get bronzzzzzzed. Forget foundation and use this 'Dew The Hoola' liquid bronzer from benefit, gives a subtle glow and is a much better choice when you're already tanned, perfect for the summer
STEP THREE: Cover up those bags- Abercrombie chicks don't have eye bags, what the hell have they got to loose sleep over?! So ensure you get those bad boys hidden away. Benefit's BOIING concealer is a good option for a natural but effective cover-up
STEP FOUR: HIGHHHHHLIGHTTTTTERRRRRRRR! Of course when you're bred in California you just glow 24/7, it like beams from their insides. So grab your fave liquid and creme highlighters with golden undertones and layer some on your cheekbones, nose and cupids bow. Ensure you set all this with some powder too- an Abercrombie girl never dims her shine. Of course add some powdered bronzer on your cheeks too if you fancy an extra little kick of tan. 
STEP FIVE: Get this face locked in before anyone realises we're frauds by spraying setting spray all over (notice my graceful setting spray face here... we all have one). Not only does this ensure your makeup stays put, it keeps you looking dewy and fresh all day, just like you stepped off a beach
STEP SIX: Whip out some natural looking glawsss (I've been re-watching Jersey Shore if you can't tell) and get those smackers looking shiny. 
There you have it! The perfect Abercrombie girl glam, now you can walk into a Hollister with your head held high!


SHARE:
0 comments

How To Get Perfectly Plumped Puckers (Without The Needles)

Leave a Comment
We are currently living in the era of many things, Brexit, Trump and of course, Kylie Jenner. When you think of this Queen of Instagram everyone thinks of those lips. Now I dunno about you but I'd rather spend my money on the Friday night sesh or new shoes than lip injections (plus needles and me are not buddies... I shouted, quite unexpectedly at a Doctor once) So if you still fancy plumping up your pluckers a little without the cost or pain of surgery then here's a little tutorial to get you on your way!
1. Grab yourself a lip mask ( I know, most extra thing in life) Leave on for around 15 minutes depending on the brand, they give you nourishment and often an extra little plump, making them the perfect tool to use before applying a heap of lippy
 2. Lip contouring is something I've seen floating around Instagram, it's supposed to give your lips more volume and a fuller appearance. Use a brownish lip liner and colour in the corners, line the edges and draw a deep line down the middle. You look like the ugly step sister in Shrek to begin with but just trust me here
SHOP: MAC WHIRL LIP LINER  
3. Now pull out your favourite lippy and fill in the rest of your smackers, ensuring it's thick enough to cover the contour but not too heavy that it looks cracked. Then take your liner and blend the two together over the edges 
SHOP: MAC BRAVE LIPSTICK
 4. Now glowse those bad bois hunny. Make sure you use a plumping lip gloss coz... I mean duh
SHOP: SOAP AND GLORY LIPGLOSS
 5. Finally highlight your cupids bow to really define it and then shade a tiny amount of bronzer under your bottom lip to give the look of a shadow. There you have it! Plumped and lavely with no blood, sweat and tears and enough money left to get those Topshop jeans you've had your eyes on
SHOP: MARYLOUMANIZER THE BALM HIGHLIGHTER

SHARE:
0 comments

How To Get 'Woke Up Like This' Curls

Leave a Comment
We've all seen those annoying films or T.V shows where the girl wakes up from a good nights sleep with perfect hair, and I bet you've all sat there, clutching a bowl of Ben and Jerry's wearing old p.j's yelling internally -  "FRAUD!!" Well, no more must we watch these moments filled with jealously and rage because this quick and easy tutorial gives you all the ways you need to create the perfect 'woke up like this' curls, hope you enjoy!
1. Run some Smooth Serum through wet hair to ensure you get rid of frizz, my favourite is Umberto Giannini. Most days I'll use it, totally ignore my hair and focus on more important things like custard and Pinterest and then end up with fab beachy waves, no heat (or effort) needed. HOWEVER for something a little more 'groomed' might be worth putting the custard down (maybe that's just me) and following the next few steps!
 2. Blow dry your hair, try doing this as smoothly as possible, so you won't need to straighten it before the curlers come out
 3. Once hair is dry, or at least damp, it's often worth using some Mousse to ensure that the curls we create hold for a couple of days (especially if you intend on sleeping on them)
 4. Separate hair into 3 layers (you might get away with 2 depending on length and thickness) then wrap a strand round the curling iron ensuring that you hold in a vertical angle for around 10 seconds (again if you've got thinner hair don't ignore the smoke and flames by counting to ten!) Once released spray each section with hairspray
 5. Ok, I'm fully aware that at this point, we look ridiculous, like a weird Medusa vibe, but just stick with it. Drown this monstrosity with hairspray and DON'T TOUCH the curls until they've completely cooled, normally safe to leave it around 5 minutes. Then once it's safe, brush out the curls and give one final spritz with hairspray and BOOM left with soft, loose bouncy curls, which will last through a nights sleep (I'm the biggest fidget and they still hold so they're strong!) Now you can wake up like a Disney Princess and let the small woodland creatures get you ready for the day.


SHARE:
0 comments

How To Reduce Your Visible Pores

Leave a Comment
There's nothing more frustrating than the little annoyances in life- paper cuts, broken heels and pores. Tiny, little speckles of dirt and grossness just clogging up our skin- RUDE. Sometimes it doesn't matter how clean we keep our skin these little buggars just find a way to seek shelter from all cleansers. SO here are a few simple steps to really attack them bad boys and keep noses fresh and dandy. There's a few strange tips in here but just stick with it! Hope this helps.
1. Clean your skin, remove all makeup and dirt from the day so we start this battle with a clean canvas
2. The best way to lure pores from their hiding place is a good steam. Heat is perfect to open pores nice and wide so they have nowhere to hide when it comes to cleaning them out. So boil some water, pour into the sink and pop in one of these 'Toner tabs' from LUSH, it ensures that all water and steam are filled with antiseptics and tea tree water (whole buncha goodies). Lean over the sink, put a towel over your head and let the steam from the sink do its work.
3. Grab some Biore pore strips and put across your nose (looking like a little penguin) leave for around ten minutes then enjoy the agonising yet satisfying chore of ripping it off again (NOT FUN)
4. Here's for one of the weird little remedies, but trust me it works. Mix together lemon juice and bicarbonate of soda and then use a small tooth brush to brush the mixture into your pores. The acidity of the mix should dissolve dirty pores stubborn enough to avoid the first attempts.
5. ANOTHER strange little trick. We worked hard to open up our skin, and now we've cleaned it, it's important to close the door, so the pollution of everyday life doesn't muck it up again. The answer to this- ICE! While heat opens pores, coldness will shut them again and the best way to do this is rub some fresh out the freezer ice all over your nose or wherever else you've targeted. Finally use a toner to lock the doors we've closed and enjoy your brand new poreless skin! LAVELYYY
SHARE:
0 comments
Previous PostOlder Posts Home
BLOG TEMPLATE CREATED BY pipdig